Haploview software is a Java based open source software, developed by Broad institute at MIT for haplotype analysis and LD visualization. I recommend reading more about it at this Link for in-depth information.
As per the documentatioin of this software, one can perform wide range of analyses such as LD & haplotype block analysis, haplotype frequency estimation, association analysis, and visualization and plotting LD and haplotypes. However, in this tutorial I will be showing the following key elements required to perform analyses in Haploview:
- Downloading software and its system requirements
- Creating input files (.ped and .info)
- Importing data in Haploview
- Calcluating Haplotypes
- Exporting Haplotypes’
- Plotting LD heatmaps
- Exporting LD plots
1. Download Haploview and Java Runtime Environment (JRE)
Please download the software and the correct version of JAVA as per your operating system (i.e. Windows, MAC and Linux) at this link: Download Haploview here
- Haploview requires Java JRE 1.3 or later, but 1.4 is strongly recommended.
- Requires min of 128M RAM
2. Create input files (.ped and .info files)
Haploview takes in a wide range input file formats, however, i am going to show how to modify your data in the Linkage Format. Please read the haploview documentation for more details.
There two required files for Linkage Format: .ped and .info files. The details are below:
2.1 .ped file
.ped file (Linkage Pedigree) requires the columns for familyID, individualNames, fatherName, motherName, gender, affected status and genotypes
familyID : Individual’s family name.
individual ID : Genotype IDs of the progeny
father’s ID : Parent 1 name or “0” if unknown father.
mother’s ID : Parent 2 name or “0” if unknown mother.
sex : Individual’s gender (1=MALE, 2=FEMALE).
affection status : Affection status to be used for association tests (0=UNKNOWN, 1=UNAFFECTED, 2=AFFECTED).
marker genotypes : Each marker calls in either ACGT or 1-4 format, where: 1=A, 2=C, 3=G, T=4. And 0 if missing data.
For reference, please check out the screen shot of a sample .ped file below.
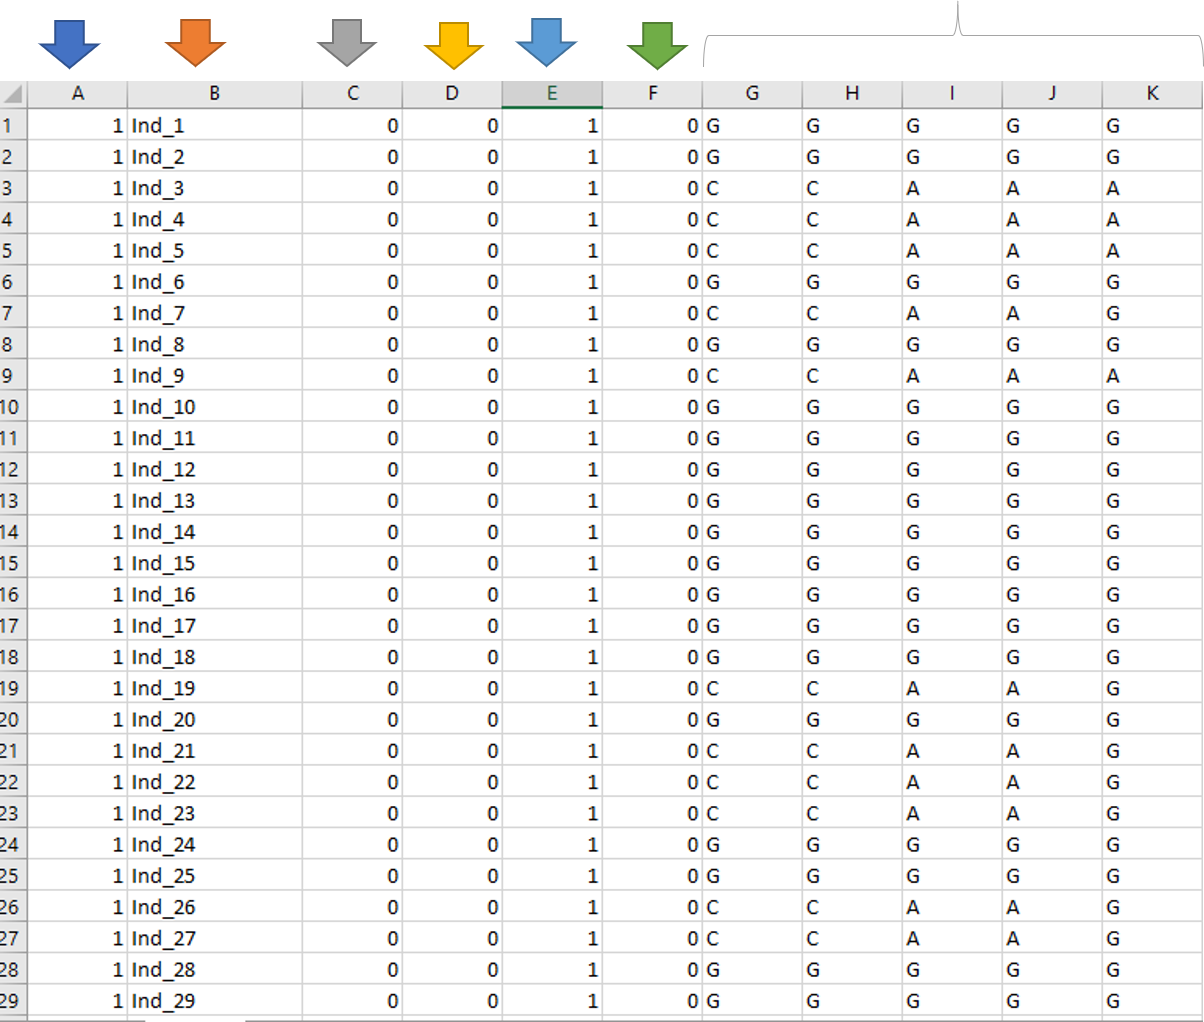
Note: Please make sure there is NO header row as shown in the above screenshot, and its easier to modify your data in MS Excel.
2.2 .info file
The .info file consists of two columns: Marker names and Physical positions of the markers
For reference, please check out the screen shot of a sample .info file below.
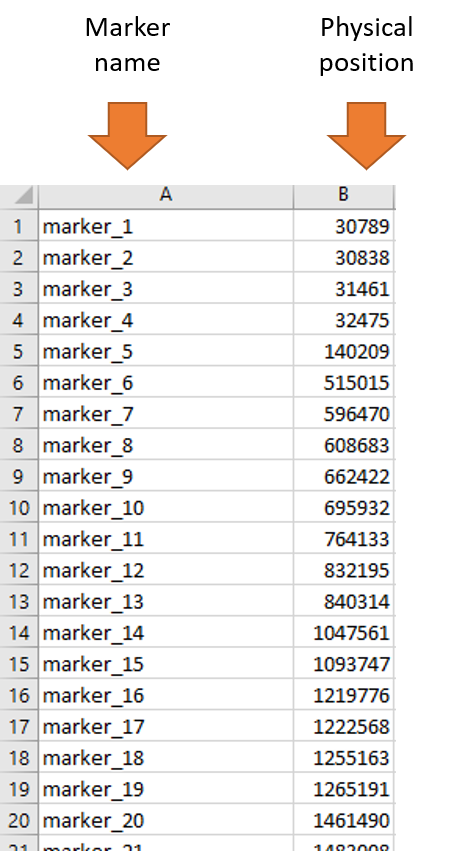
Note: Please make sure there is NO header row as shown in the above screenshot and its easier to modify your data in MS Excel. Also, please remember the marker order in both .ped files and .info are in same order!
3. Download sample files
Please downnload sample .ped and .info files from below links:
4. Importing and performing analysis in Haploview
Once the .ped and .info files are ready, it can be imported by following the steps i have shown in below animation:
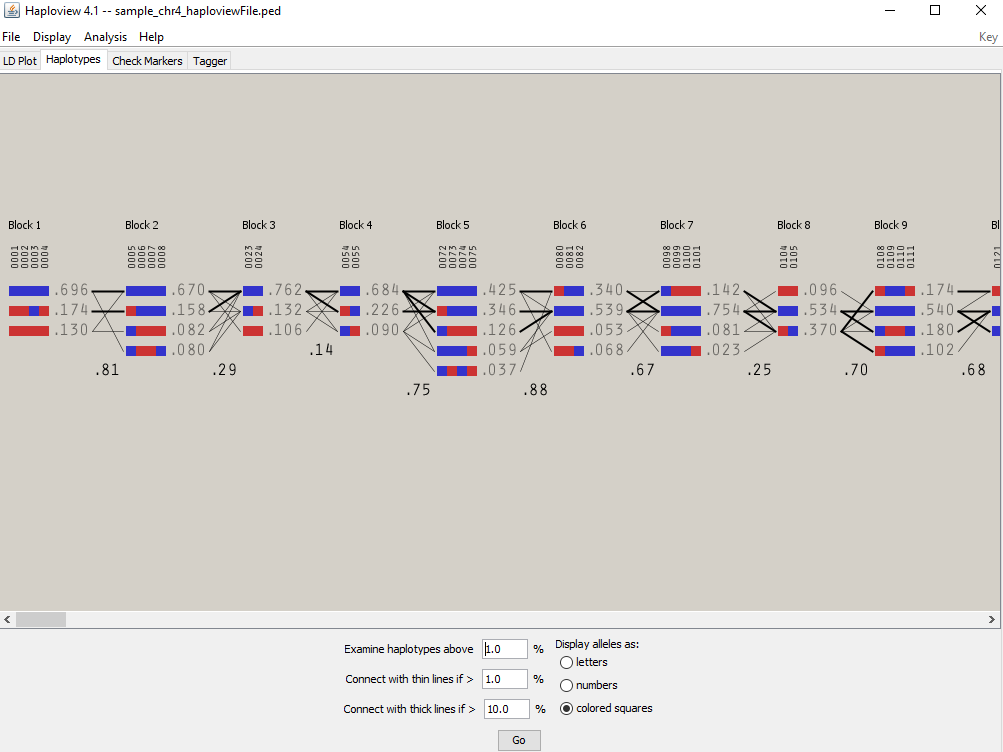
5. Screen shot of Haplotypes
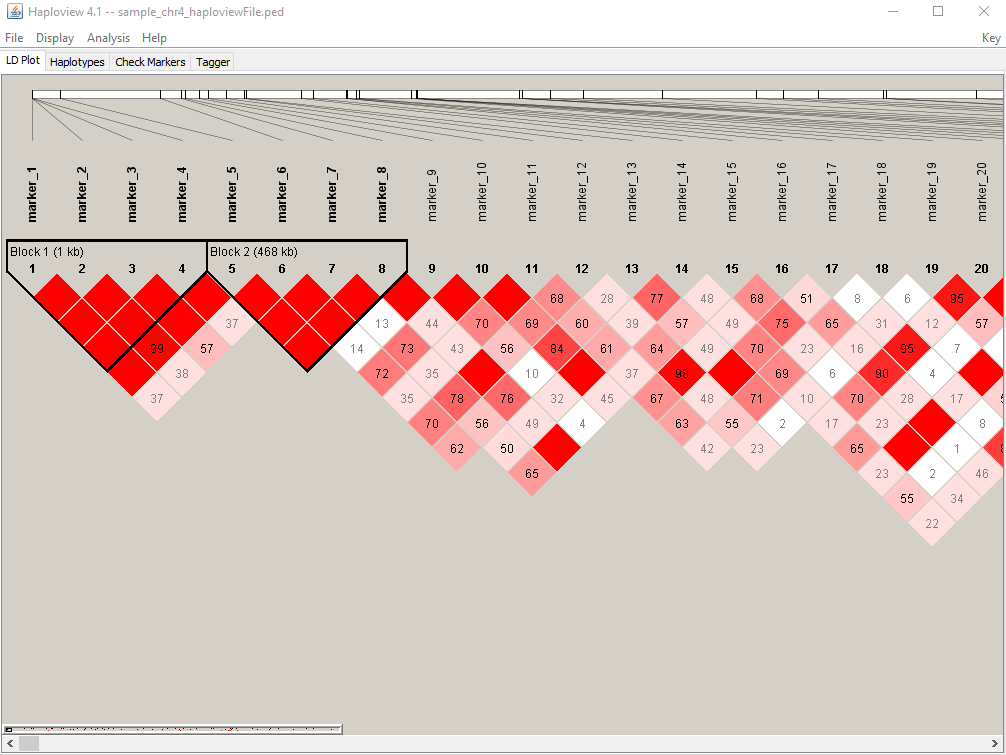
6. Screen shot of LD heatmap
Thank you for reading this tutorial. I really hope these steps will assist in your analysis. If you have any questions or comments, please comment below or send an email.
Bibliography
Barrett JC, Fry B, Maller J, Daly MJ. Haploview: analysis and visualization of LD and haplotype maps. Bioinformatics. 2005 Jan 15 [PubMed ID: 15297300]